Freelance Post-Production Workflow: Picture Lock and 2 Review Rounds
Freelance Post-Production Workflow: Picture Lock and 2 Review Rounds
Run every project through one pipeline: setup, ingest, rough cut, fine cut, picture lock, finishing, delivery. The single rule that protects your margin is treating picture lock as a formal gate. No finishing work starts until the client signs off on locked picture, full stop. Everything below builds toward that discipline, and a workspace like Posthive can hold the version history and approvals that make the rule enforceable instead of aspirational.
TL;DR:
- Using a formal picture lock as a milestone prevents costly rework and ensures all finishing work is based on a confirmed edit.
- Organizing footage in a numbered folder template and verifying checksums at ingest reduces delays and project stalls caused by disorganized files.
- Proxies are essential for 4K or heavily compressed footage, with frame-for-frame proxies preferred for reliable relinking and smooth editing.
- Restrict review rounds to two by default, requiring clear, timecoded feedback to avoid unnecessary iterations and scope creep.
- Centralized version control and task tracking within a dedicated workspace eliminate file ambiguities and streamline client approvals throughout the project.
Table of Contents
- What Are the Stages of a Freelance Post-Production Workflow?
- Building a File Structure That Survives a Deadline Crunch
- When Do You Actually Need a Proxy Workflow?
- How Do You Run Rough Cut, Fine Cut, and Picture Lock Without Rework?
- What Order Should Finishing Passes Follow?
- How Many Review Rounds Should You Include by Default?
- How Do You Track Versions and Tasks Without Losing Files?
- How Do You Package and Deliver the Final Files?
- Which Tools Should Freelancers Actually Use for This Workflow?
- How Long Should a Freelance Post-Production Project Take?
- Getting the Contract and Scope of Work Right Before You Start
- Scheduling and Resource Allocation When You’re the Whole Team
- Running Three Freelance Projects at Once Without Dropping One
- How Should Freelance Post-Production Invoices Be Structured?
- A Freelancer’s Working Habits and Cheat Sheet
- Where Posthive Fits Into This Workflow
- Sources
- FAQ
What Are the Stages of a Freelance Post-Production Workflow?
A reliable video production workflow breaks into seven distinct stages, each with its own deliverable and its own definition of “done.” Skipping the definition of done is what causes freelancers to redo work they thought was finished.
Setup. Before you touch a single clip, lock the project settings: frame rate, resolution, color space, and audio sample rate, matched to the camera source and the delivery spec. Create the folder structure and naming convention now, not after the first import. Done means: project file created, folders built, client brief and reference materials filed.
Ingest and organization. Pull footage off cards, verify the copy, and label selects. This is also when you build your proxy set if the footage demands it. Done means: every card backed up twice, metadata logged, and a select reel or bin structure ready for the editor (even if that editor is you).
Rough cut. This is structure, not polish. You are answering one question: does the story work in this order? Temp music, placeholder graphics, and scratch audio are fine here. Done means: a full-length assembly that a producer or client can watch start to finish and follow the intended narrative.
Fine cut. Pacing, trims, music selection, and sound design get refined. Graphics move from placeholder to near-final. Done means: the edit plays at its intended runtime with no structural gaps, and any VFX or graphics shots have a locked shot list.
Picture lock. The client has approved the cut. No further trims, no reordering, no new shots. This is a checkpoint, not a vibe, and the next section covers exactly what belongs on that checklist.
Finishing. Color grading, final audio mix, VFX comps, and titles get applied to a picture-locked timeline. Because nothing moves after lock, finishing artists (even if that is still you, wearing a different hat) can work without chasing a moving target.
Export and delivery. Master file first, then platform derivatives, then a verification pass before the client ever sees a link.
The most common failure mode is overlap: starting a color grade while the client is still requesting trims, or building lower-third graphics against a rough cut that later gets restructured. Every hour spent on a stage that gets undone later is an hour billed at a loss. A standard pipeline structure, echoed across industry breakdowns of the editing process, consistently separates “figuring out the story” from “polishing the picture,” and freelancers who blur that line are the ones re-cutting a graded sequence at 11 PM the night before delivery.
- Setup: project settings locked, folders built, brief filed
- Ingest: footage copied twice, metadata logged, selects labeled
- Rough cut: full assembly, story order confirmed
- Fine cut: pacing and sound refined, VFX shot list locked
- Picture lock: client sign-off, no further structural changes
- Finishing: color, audio mix, VFX, titles applied
- Delivery: master exported, derivatives generated, QC passed
Building a File Structure That Survives a Deadline Crunch
Disorganized footage is the single most common cause of a project stalling mid stream, according to file management guidance for freelance editors. The fix is boring on purpose: a numbered folder template you reuse on every job so your brain, and any collaborator who opens the project, knows exactly where to look.
A template that works across almost any project type:
01_Footage(raw, untouched camera originals)02_Audio(production sound, separate from footage)03_Proxies(transcoded editing copies)04_Project_Files(your NLE project, saved versions inside)05_Graphics_VFX(logos, lower thirds, comps, plates)06_Music_SFX(licensed tracks and sound effects)07_Exports(masters and delivery derivatives)08_Client_Docs(contracts, briefs, approval emails)
Numeric prefixes matter more than they look. They force the folders to sort in the order you actually use them, which means less time hunting and fewer accidental exports pulled from the wrong bin at 1 AM.
Three rules that prevent most freelance file disasters:
- Never rename source files. Camera-original filenames often carry metadata your NLE relies on for relinking. Rename in your bin or project, not on disk.
- Generate a checksum on ingest. A simple MD5 or XXHash confirms the copy matches the card before you format anything.
- Keep two independent copies before you edit a single frame. One local, one cloud or a second physical drive. Card corruption and drive failure do not wait for a convenient week.
Your ingest checklist, run every single time:
- Verify card or drive IDs against your shoot log
- Confirm checksum match on both backup copies
- Log lens, camera, and scene metadata if your workflow uses it
- Label selects or flag unusable takes before archiving
- Note exactly where each card lives (client drive, cloud tier, cold storage)
Pro Tip: Build a one-page “archive map” spreadsheet per client, listing which drive or cloud folder holds which project’s raw footage. Six months later, when a client asks for a re-edit, you will find the source in under a minute instead of an afternoon.
Standardizing this template across every job, as suggested in guidance on repeatable freelance workflows, turns each new project into a known quantity instead of a fresh puzzle.
When Do You Actually Need a Proxy Workflow?
Proxies stop being optional the moment your footage is 4K or higher, shot in a heavily compressed or long-GOP codec, or you are editing on a machine that chokes on native playback. If your timeline drops frames or your scrub bar lags, that lag is billable time you are losing every single session.
The safest proxy setting is frame-for-frame: same frame count, same timecode, same frame rate as the original, just a lighter codec (ProRes Proxy or a similar low-bitrate intermediate) and often a reduced resolution. Frame-for-frame generation is what makes automatic relinking possible later, according to proxy workflow guidance built around remote and distributed teams. Mismatch the frame count and your relink breaks, sometimes silently, which is far worse than an obvious error.
You have two real options for generating proxies:
- Local transcode. Cheaper, no subscription cost, but it ties up your machine for hours on a long project and delays your actual start time.
- Server-side or cloud-based transcode. Costs more but lets you keep editing (or sleeping) while the server does the work, which matters most when a client hands you footage the night before a deadline.
For distributed teams and remote collaborators, server-side proxy generation and streaming review let an editor and a client look at footage in parallel instead of waiting on a download, which is often the real bottleneck in freelance handoffs.
Before you ever export a master, run this relink checklist:
- Do a test relink on a single sequence before batch relinking the whole project
- Confirm color space tags match between proxy and original (a mismatched log profile will grade wrong)
- Relink the full timeline and scrub every reel, not just the first and last shot
- Re-render a short section at full resolution and compare it against the proxy cut for drift
How Do You Run Rough Cut, Fine Cut, and Picture Lock Without Rework?
Rough cut answers “does the story work.” Fine cut answers “does the story feel right.” Picture lock answers one question only: “has the client approved this exact sequence of shots, at this exact length, with no further structural changes.”
Treat picture lock as a formal milestone, not a mood. A step-by-step post-production system built around this gate notes that finishing passes should begin only after lock is declared, because color, audio mix, and VFX work all assume a timeline that will not move again.
Your picture-lock checklist, run before you send the “locked” email:
- Every video and audio track is trimmed to final length, no gaps or overlaps
- All placeholder graphics and temp titles are flagged and listed for the graphics artist
- Temp music and scratch audio are marked for replacement in the finishing pass
- VFX shots are logged in a locked shot list with in and out timecodes
- The client has approved this specific cut in writing, by email or an approval tool, not a verbal “looks good”
That written approval matters more than it seems. A phone call “yes” turns into a dispute the moment a client wants a “small tweak” three weeks later.
Change requests after lock are not free, and you should say so plainly. A short template that keeps the relationship friendly while protecting your schedule:
“Happy to make that change. Since we’re past picture lock, this falls outside the original scope. I can turn it around by [date] for [fee], or fold it into a future revision round if you’d prefer to wait.”
Pro Tip: Send the picture-lock approval request as its own isolated email or message, separate from any other discussion thread. A buried “looks good, let’s lock it!” in a long chat is much easier for a client to later claim they never meant literally.
What Order Should Finishing Passes Follow?
Finishing runs in a specific sequence because each pass depends on the one before it being stable: audio cleanup and mix first, then color grading, then VFX and graphics polish, then a final review pass across all three together. Grade before your audio mix is locked and you will regrade after re-syncing dialogue edits. Color before VFX comps are dropped in and your comped shots will not match the graded plate.
Export your master in a lossless or high-quality intermediate codec, ProRes 422 HQ or DNxHR HQ are common choices, at your full working resolution. Every platform-specific file, the compressed web version, the vertical social cut, the broadcast delivery, gets derived from that single master rather than re-exported from the timeline each time. One master, many children, and if a client wants a re-edit next year you have a full-quality source to work from instead of a re-encoded YouTube rip.
Before you send anything, run a finishing QC pass:
- Check audio levels against delivery spec (broadcast, streaming, and social platforms all have different loudness targets)
- Watch for color consistency across cuts, especially if multiple cameras or LUTs were involved
- Confirm no burned-in timecode or watermark slipped through from a review export
- Play the final file on at least two devices, ideally a computer monitor and a phone or TV, since color and audio read differently on each
Opening the exported master at full resolution and checking it against your delivery sheet before sending is the kind of export verification step that catches a wrong aspect ratio or a muted audio track before the client does. That five-minute check has saved more freelance reputations than any single editing skill.
How Many Review Rounds Should You Include by Default?
A small number of included review rounds is the number that keeps most freelance projects sane: typically one round on the rough cut for structural feedback and one round on the fine cut for polish notes, with picture lock as the natural stopping point. Anything beyond that becomes a paid revision round, stated in your contract before the project starts, not negotiated mid-project when a client asks for a third pass.
A feedback brief that actually works needs specific fields, not a free-text email. Ask clients for: exact timecode, what they see now, what they want instead, and priority (must-fix versus nice-to-have). Vague notes like “make it punchier” cost you a follow-up call every single time.
Timecoded comments tied to a specific frame, rather than a scrolling email thread, are what real-time review tools use to cut down iteration time, according to collaborative review guidance built around synchronized viewing. The friction of “can you see my screen, scroll to 2:14, no the other 2:14” disappears when comments attach directly to a frame.
Protect your scope with plain language in your proposal, not legal jargon: “This project includes two review rounds. Additional rounds are billed at [your rate] per round.” When a client pushes past that line, a short reply keeps things professional:
“That’s a great note. We’ve used our included rounds, so I’ll treat this as revision round three at [fee]. Want me to proceed?”
Pro Tip: Number your revision rounds explicitly in every client email (“Revision Round 2 attached”). Clients rarely argue about a boundary they can see counted out loud.
How Do You Track Versions and Tasks Without Losing Files?
A simple task board with three columns, To Do, In Review, Approved, mapped to your seven pipeline stages as milestones, keeps a solo freelancer from losing track of where a project actually stands. Name each milestone after the deliverable, not the date, since “Fine Cut Delivered” survives a schedule slip better than “Friday.”
Version naming needs a rule you never break: ProjectName_v01_YourInitials_ShortNote, incrementing with every export you send out for review. BrandFilm_v03_JL_newVO.mp4 tells anyone opening that folder exactly what changed and who touched it last, without opening a single file.
Where this breaks down for most freelancers is ownership. Files live in a downloads folder, a client Drive link, and a local scratch disk simultaneously, and nobody, including you three weeks later, knows which one is current. That is the exact problem a workspace like Posthive’s version control is built to solve: one place where the current version, the review status, and the task list live together instead of scattered across email attachments and cloud links.
A practical version-control setup for a freelance project:
- One project folder per client, no exceptions, even for a quick turnaround job
- Versions live inside
04_Project_Files, never in your downloads or desktop - Every exported review copy gets logged against its milestone before it goes out
- Approval status attaches to the version itself, not to a separate email you will have to dig up later
Task tracking and version history solve a problem most freelancers underestimate until it bites them: the client who approves “the cut from last Tuesday” without specifying which of the four cuts you sent that week. A single source of truth for versions removes that ambiguity entirely, and task tracking built for editors turns a mental to-do list into something a client can see and trust without a status-update phone call.
How Do You Package and Deliver the Final Files?
Export your master once, at full quality, then generate every derivative from that file rather than re-exporting from your timeline for each platform. This keeps your color and audio consistent across every version a client receives and gives you a single archival asset if they come back for a re-edit later.
A delivery manifest turns a folder of files into something a client can actually verify. Include:
- File name and codec for each deliverable
- Resolution, frame rate, and audio spec per file
- A checksum for the master, so the client can confirm nothing corrupted in transfer
- A short note on what each file is for (broadcast master, social cutdown, archive copy)
Before you send the link, run a final verification pass: play the master on at least two devices, check that any subtitle or caption file is synced and spelled correctly, and confirm your checksum still matches after upload. A file that corrupts silently during a cloud transfer is a far worse conversation than a late delivery.
Tools for sharing large video files without quality loss matter here, since a compressed link that degrades your carefully graded master undoes the entire finishing pass in one click.
Which Tools Should Freelancers Actually Use for This Workflow?
Your stack depends less on budget alone and more on how distributed your collaborators are and how complex the project gets.
Solo freelancer, straightforward turnaround. A single NLE (DaVinci Resolve, Premiere Pro, or Final Cut Pro) handles edit and often color and audio in one app. Local storage with a cloud backup covers most needs, and a lightweight review tool with timecoded comments replaces the endless email thread.
Remote collaborators across time zones. Streaming preview matters more than raw storage space here, since nobody wants to wait on a multi-gigabyte download before they can leave a note. Org-owned cloud storage, rather than a personal Drive link, keeps ownership of client assets clear if a collaborator relationship ends.
Heavier VFX or AI-assisted rough assembly. AI tools now handle mechanical tasks well: auto-captioning, silence removal, and rough assembly cuts, while the actual story and pacing decisions stay with you. A hybrid AI-assisted production approach speeds up the mechanical first pass without handing over creative judgment, which is the part clients are actually paying for.
- Solo, fast turnaround: single NLE plus lightweight cloud backup and comment tool
- Remote team: streaming preview, timecoded review, org-owned cloud storage
- AI-assisted rough cuts: mechanical tasks automated, story decisions kept manual
- Heavy VFX: dedicated compositing app feeding back into your main NLE timeline
Lightweight local setups win on cost and control for a single short project. Cloud-native workspaces win the moment a second person, a client, a colorist, a client’s marketing team, needs to see or touch the files before delivery.
How Long Should a Freelance Post-Production Project Take?
A social cutdown (60 to 90 seconds) typically runs three to five business days from ingest to delivery, assuming footage arrives organized. A brand film (three to six minutes) runs two to three weeks, largely because it usually carries two full review rounds and a color grade. A long-form documentary or corporate piece can run six to twelve weeks, driven mostly by review-round count and VFX complexity rather than raw runtime.
Four levers move your price and your timeline more than anything else: resolution and codec (4K raw footage costs more machine time than 1080p), VFX complexity (a single title card versus a full compositing sequence), number of review rounds (each additional round adds days, not hours), and turnaround urgency.
State your fast-track language plainly in a proposal: “Standard turnaround is [X] business days. Rush delivery under [Y] days carries a [percentage] surcharge.” Do the same for scope creep: “Change requests submitted after picture lock are billed at [rate] per revision round, quoted before work begins.”
- Social cutdown: 3 to 5 business days
- Brand film: 2 to 3 weeks
- Documentary or long-form: 6 to 12 weeks
- Rush surcharge and post-lock change fees: state both in writing before the project starts
Getting the Contract and Scope of Work Right Before You Start
A scope of work document that actually protects you names five things: deliverable length and format, number of included review rounds, revision-round pricing, ownership of raw and final files, and payment terms tied to milestones rather than a single lump sum at the end.
Vague scope is where freelance post-production projects lose money. “Edit the wedding video” invites a client to expect four versions, four platforms, and unlimited tweaks for one flat fee. “One 4 to 6 minute highlight film, delivered in one master format plus one vertical social cut, with two included review rounds” invites exactly what you intend to deliver and nothing more.
Tie payment to milestones instead of a single invoice at the end: a deposit at signing, a second payment at picture lock, and a final payment at delivery. This protects your cash flow through a long project and gives the client a natural checkpoint to confirm they are happy with direction before you sink hours into finishing.
Put file ownership in writing too. Clarify whether the client owns raw footage, final masters only, or the full project file, since this affects both your archive obligations and whether you can reuse any footage in a demo reel. A short paragraph in your contract avoids a much longer argument later:
“Client owns final deliverables listed in Section 2. [Your name] retains raw footage and project files for [archive period], after which they may be deleted unless archival storage is separately arranged.”
Attach your review-round count and change-order pricing directly into the contract, not just a verbal mention on your kickoff call. The contract is the document a client actually rereads when a dispute starts.
Scheduling and Resource Allocation When You’re the Whole Team
Block your calendar by pipeline stage, not by project name. “Tuesday morning: fine cut, Client A” tells your brain what mode to be in far better than a generic “work on Client A.” Editing, color, and client calls each demand a different kind of attention, and switching between them mid-morning costs you more focus than the task list suggests.
Batch similar tasks across projects where you can. If you have color grading due on two separate projects in the same week, do them back to back while your eye is calibrated to your monitor and lighting, rather than alternating between grading and rough cutting all week.
Build buffer days into every schedule you give a client, not just the tight ones. A one-day buffer before delivery absorbs a hard drive hiccup, a slow render, or a client who takes an extra day to approve picture lock, without blowing your deadline.
Reserve your highest-focus hours, morning for most editors, for creative decisions like fine cut pacing and color grading. Push mechanical tasks, ingest, file renaming, export queuing, into lower-energy windows. A calendar and timeline template that maps folder rules to a project schedule keeps this consistent instead of reinvented for every new client.
Running Three Freelance Projects at Once Without Dropping One
Stagger your pipeline stages across projects deliberately. If Project A is in client review, Project B should be in active editing, and Project C should be in ingest. Overlapping the waiting stage of one project with the active stage of another is how you keep billable hours flowing instead of sitting idle during a client’s slow approval turnaround.
Never rely on memory for which project is where. A single dashboard, even a simple one, showing each project’s current stage and next deadline prevents the classic freelance mistake of missing a picture-lock deadline because you were deep in another client’s color grade.
Communicate proactively when projects compete for the same week. A short note, “I’m balancing a rush delivery this week, so your review notes on Thursday will get turned around by Monday instead of Friday,” costs you nothing and prevents a client from wondering why you went quiet.
Resist accepting a third rush project just because the money is good, if it means your other two clients get a slower version of you than they signed up for. A missed picture-lock deadline on one project usually costs more in trust than the extra rush fee earns you on another.
How Should Freelance Post-Production Invoices Be Structured?
Split your invoice into the same milestones as your contract: deposit at signing, progress payment at picture lock, final payment at delivery. This mirrors your actual cash-flow needs and gives clients a natural, expected checkpoint rather than a surprise bill at the very end of a long project.
Invoice within 24 hours of hitting a milestone, not at the end of the month. A picture-lock invoice sent the same day the client approves the cut lands while the approval is fresh in their mind, and it separates cleanly from any post-lock change-order billing that might come later.
Itemize change orders separately from your base invoice. A line reading “Revision Round 3 (post-lock), 2 hours at [rate]” is far easier for a client’s accounting department to approve than a vague lump-sum increase with no explanation attached.
Set a clear late-payment term in your contract, a specific number of days plus a stated late fee, and reference it plainly rather than apologetically if a payment slips past the deadline. Freelancers who treat their own payment terms as optional teach clients to treat them the same way.
A Freelancer’s Working Habits and Cheat Sheet
The freelancers who run the smoothest projects are not necessarily the fastest editors. They are the ones who never let a small organizational task slide, because a skipped ingest checklist or a missing checksum always resurfaces at the worst possible moment, usually the night before delivery.
A few habits worth stealing: run backups and transcodes overnight so your editing hours stay dedicated to actual creative work. Start each morning by syncing your task board against your calendar, five minutes that saves you from discovering a deadline conflict at 4 PM. Keep a delivery log, one line per project noting what was sent, when, and to whom, so a client asking “did you send the final file?” gets an instant answer instead of a scramble through old emails.
A one-page cheat sheet worth copying into whatever tool you use:
- Ingest: verify, checksum, back up twice, label selects
- Rough cut: structure only, temp everything
- Fine cut: pacing, sound design, locked VFX list
- Picture lock: written approval, no exceptions
- Finishing order: audio, then color, then VFX, then final QC
- Delivery: master first, derivatives from master, manifest attached
For a deeper walk through any of these stages, the Posthive blog covers folder templates, task tracking systems, and version control setups built specifically around freelance and small-team post-production work.
— Lorenz
Where Posthive Fits Into This Workflow
Some workspaces offer the ability to keep versions, tasks, and client approvals in one place instead of scattered across email, cloud drive links, and text messages. Version control features help keep version history organized without renaming chaos. Task tracking can turn a milestone list into something a client can see progress on without a status call. Cloud connectivity can allow collaborators or clients to review the current cut rather than downloads of older versions.
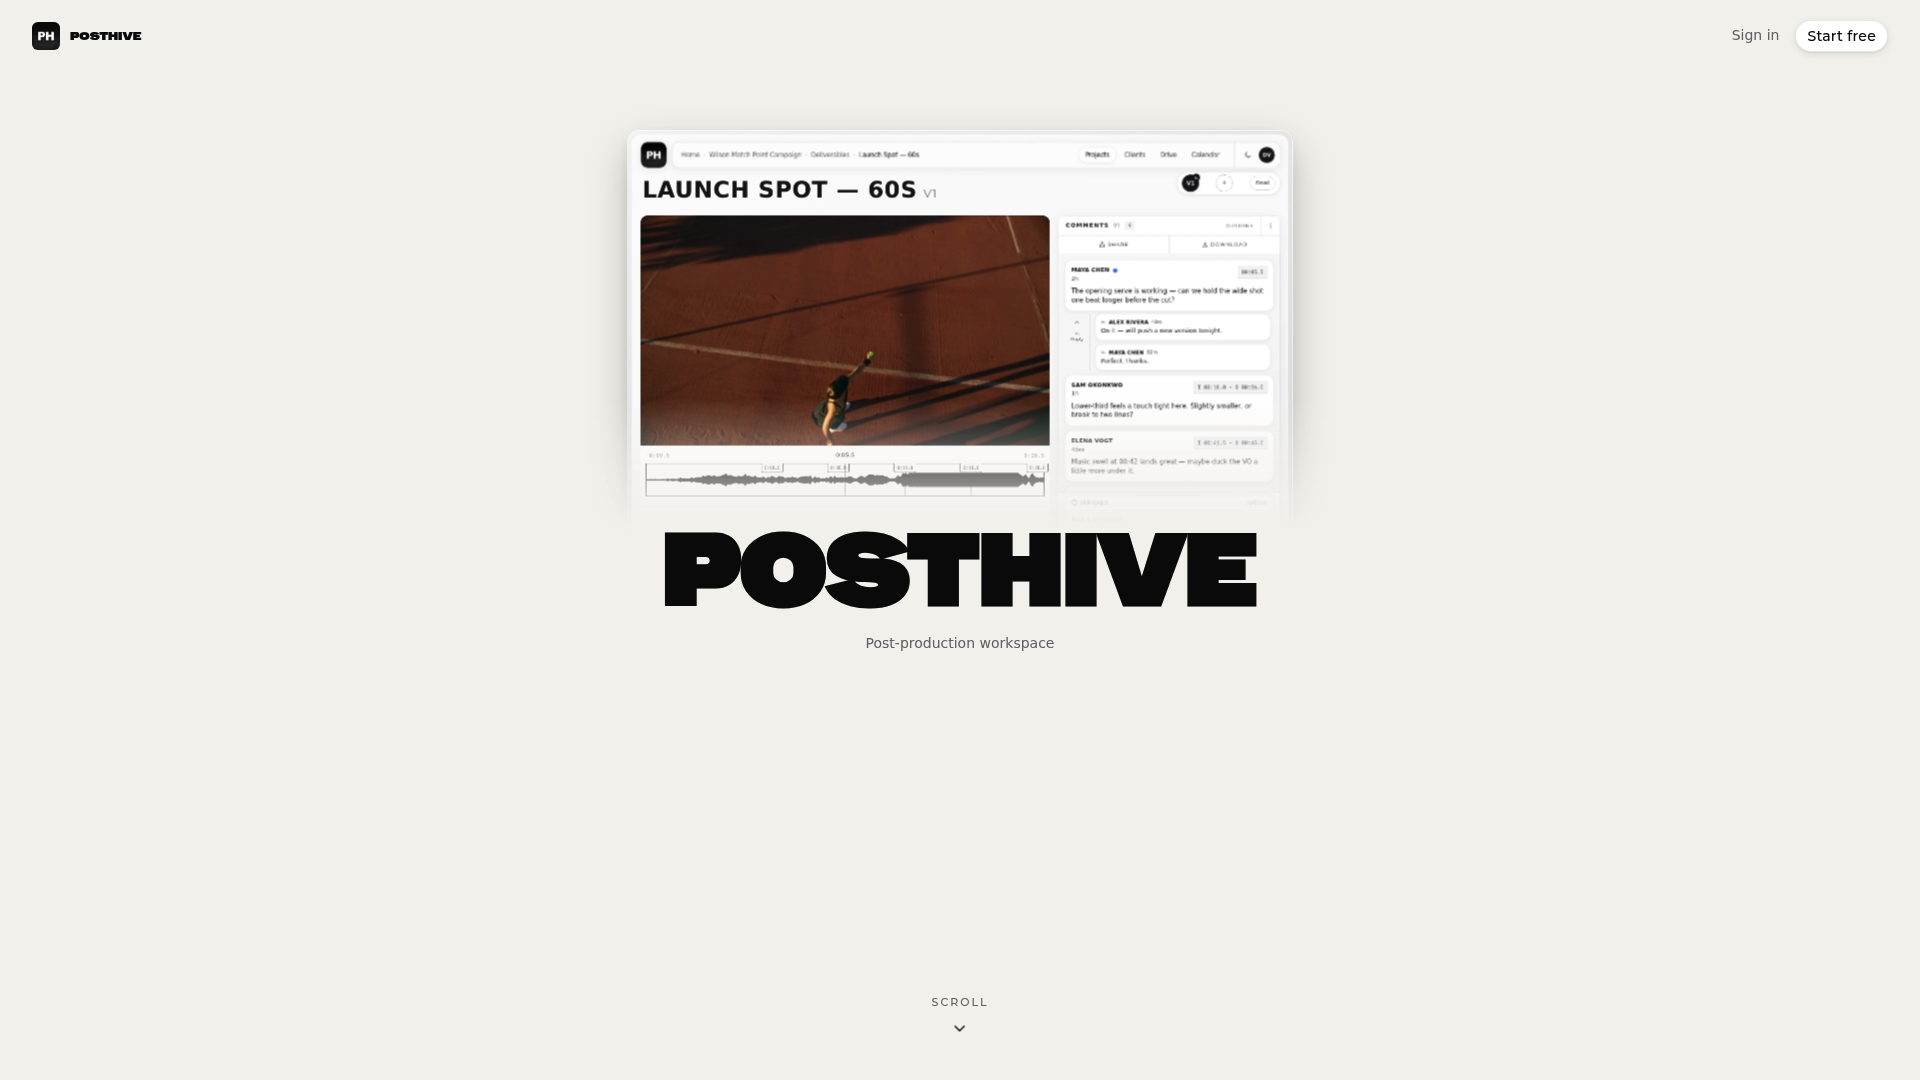
That last point solves a specific freelance headache: the client who approves “the version I watched last week” without realizing you sent two more cuts since then. A shared workspace with one clear current version removes that ambiguity before it turns into a dispute over what was actually locked.
If the folder templates, picture-lock checklists, and version rules in this guide sound like the discipline you want but have never had a single tool to enforce, start a project on Posthive and see how version ownership and task tracking hold together on your very next client handoff.
Sources
- Video Editing Workflow: A Step-by-Step Guide For Creators — Bonomotion
- Post-Production Workflow: How to Build an Efficient Post-Production Workflow for Video Teams — Fastio
- Video Editing Workflow: Step-by-Step Post-Production System — SocialRevver
FAQ
When do I actually need a proxy workflow?
Proxies become necessary once footage hits 4K or higher, uses a heavily compressed codec, or causes dropped frames during playback on your editing machine.
What exactly counts as picture lock?
Picture lock means the client has given written approval on a specific cut, with all tracks trimmed to final length, placeholders flagged, and a locked VFX shot list, after which no structural changes happen until finishing is complete.
How many review rounds should I include by default?
Two included rounds, one on the rough cut and one on the fine cut, is a workable default, with any additional rounds billed separately and stated in the contract upfront.
What codec should my delivery master use?
Export your master in a lossless or high-quality intermediate codec like ProRes 422 HQ or DNxHR HQ, then derive every platform-specific file from that single master.
How do I keep track of versions without losing files?
Use a consistent naming convention like ProjectName_v01_Initials_Note and centralize version history in one workspace, a tool like Posthive keeps version ownership and approval status attached to the file itself rather than scattered across email threads.